Tập trung vào setup Jenkins trên GCP, không phải tập trung vào configuration Jenkins nên những configuration này để learning.
Jenkins và Cloud Build là hai công cụ CI/CD (Continuous Integration/Continuous Delivery) mạnh mẽ, nhưng chúng hoạt động theo các mô hình khác nhau, đặc biệt là trong bối cảnh của Google Cloud Platform (GCP).
Jenkins vẫn là công cụ mạnh mẽ với plugins phong phú nhưng nếu đang dùng GCP và các dịch vụ của GCP như Cloud Storage, Artifact Registry (kho lưu trữ Docker), GKE và App Engine thì nên dùng Cloud Build vì chung hệ sinh thái nên dễ dàng tích hợp. Dùng helm để cài Jenkins trên GCP.
Helm là một công cụ mã nguồn mở được phát triển bởi cộng đồng Kubernetes, hoạt động như một trình quản lý gói tương tự npm (Node.js) hoặc pip (Python)
Chi Phí
Cloud Build: hoạt động theo mô hình trả tiền theo mức sử dụng (pay-as-you-go), miễn phí 120p mỗi ngày, sau đó $0.003 mỗi phút.
Jenkins: trên GCP chi phí sẽ đắt hơn vì phải chi trả
- Compute Engine (VM): 24/7
- Google Kubernetes Engine (GKE): master node, worker node,
- Nhân sự: để cài đặt, cấu hình, quản lý, bảo trì. Chi phí Jenkins có thể sẽ thấp nếu bạn có 1 server riêng để chạy Jenkins nhưng sẽ tốn nhiều thời gian để tích hợp vào cách cách dịch vụ GCP. Biết là Cloud Build sẽ tốt hơn nhưng bài viết này sẽ tìm hiểu cách setup Jenkins trên GCP. Trước tiên vài notes về tạo SSH key cho github.
Tạo SSH key cho Github
Một SSH key sẽ có private và public key.
- public key (.pub), add vào github.
- private key, add vào Jenkins.
Tạo SSH key
-t ed25519: thuật toán mã hóa được sự dụng nhiều nhất hiện nay, truyền thống thì có RSA, -t rsa -b 4096 (2048 bit).
Win 11 mở git base để chạy ssh-keygen, sau khi tạo thì key sẽ được lưu ở folder: ~/.ssh
-f id_github: muốn chủ động đặt tên file, file sẽ lưu ở folder hiện hành.
ssh-keygen -t ed25519 -C "your_email@example.com"Tạo known_hosts.pub
Xác thực máy chủ SSH của GitHub và lưu trữ thông tin đó vào một tệp tin, giúp đảm bảo bạn đang kết nối đúng máy chủ và tránh các cuộc tấn công trung gian (man-in-the-middle).
ssh-keyscan -t ed25519 github.com > known_hosts.github
chmod +x known_hosts.github
cat known_hosts.github
Tạo file config
Trường hợp có nhiều account github và nhiều ssh keys thì nên remove global user.name và user.email. Set user.name và user.email cho từng projects. Tạo thêm file config trong .ssh folder để map host với key
git config --global --list
git config --global --unset user.name
git config --global --unset user.email
Set user.name và user.email cho từng projects, phải đứng trong project
git config user.name "your name"
git config user.email "your_email@gmail.com"
config file (without extension) trong .ssh trỏ vào private key.

# abc account
Host abc-github
HostName github.com
User git
IdentityFile ~/.ssh/id_abc_github

# xyz account
Host xyz-github
HostName github.com
User git
IdentityFile ~/.ssh/id_xyz_github
Đã dùng ssh key thì phải clone kiểu ssh, nhưng phải đổi github.com thì tên host để map vào private key
original: git@github.com:quachson/generated-value-set.git
change to: git@xyz-github:quachson/generated-value-set.git
git clone git@xyz-github:quachson/generated-value-set.gitNếu gặp lỗi chưa có permission thì chạy thêm lệnh add private key
eval "$(ssh-agent -s)"
ssh-add ~/.ssh/id_xyz_github
Project đang HTTP, đổi sang SSH thì làm sao
git remote -v
git remote set-url origin git@bitbucket.org:your-workspace/your-repo.git
git remote -v
Install Jenkins trên GCP
- Tạo cluster
jenkins-cd(có cluster rồi thì ignore) - Get quyền cho cluster để dùng các lệnh: kubect1, helm
- Tạo Jenkins bằng helm
- Forward port: 8080
- Run Jenkins với external IP:8080, username: admin, password: xem bên trên
Các lệnh gcp
gcloud container clusters create jenkins-cd 0-num-nodes 2 --scopes "https://www.googleapis.com/auth/projecthosting,cloud-platform"
gcloud container clusters get-credentials jenkins-cd
helm repo add jenkins https://charts.jenkins.io
helm repo update
helm install cd jenkins/jenkins -f jenkins/values.yaml --wait
kubectl create clusterrolebinding jenkins-deploy --clusterrole=cluster-admin --serviceaccount=default:cd-jenkins
export POD_NAME=$(kubectl get pods --namespace default -l "app.kubernetes.io/component=jenkins-master" -l "app.kubernetes.io/instance=cd" -o jsonpath="{.items[0].metadata.name}")
kubectl port-forward $POD_NAME 8080:8080 >> /dev/null &
Setup Jenkins trên GCP
-
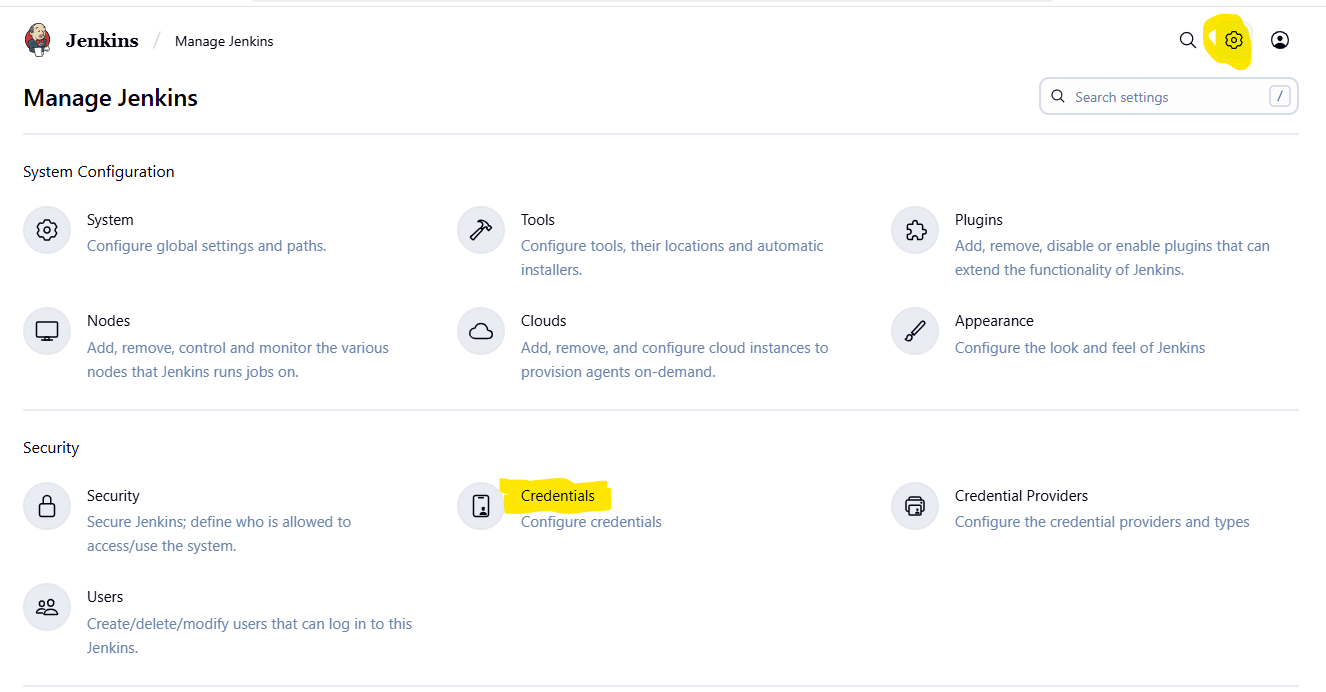
Add [project_id] as Google Service Account from metadata vào Security --> Credentials

-
Create New cloud (Kubernetes)
- Jenkins URL: http://cd-jenkins:8080
- Jenkins tunnel: cd-jenkins-agent:50000
-
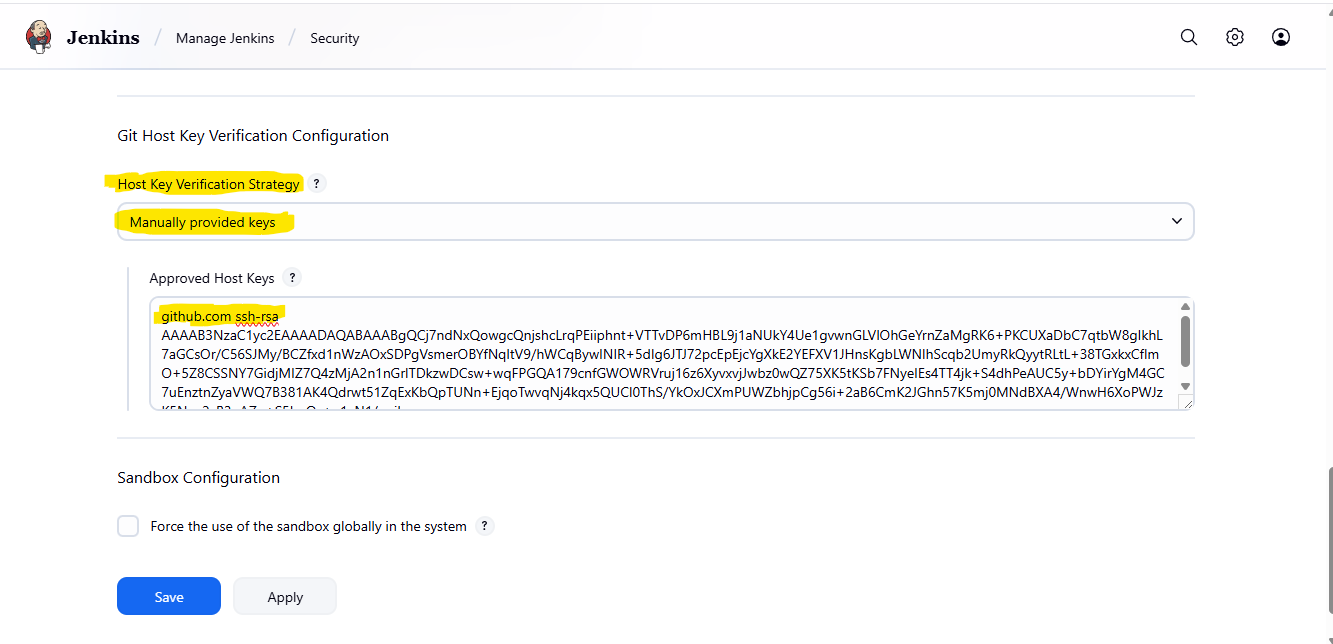
Configure known host key

- Security / Git Host Key Verification Configuration / Host Key Verification Strategy: Manually provided keys
- Paste the known hosts.github file content in Approved Host Keys.
-
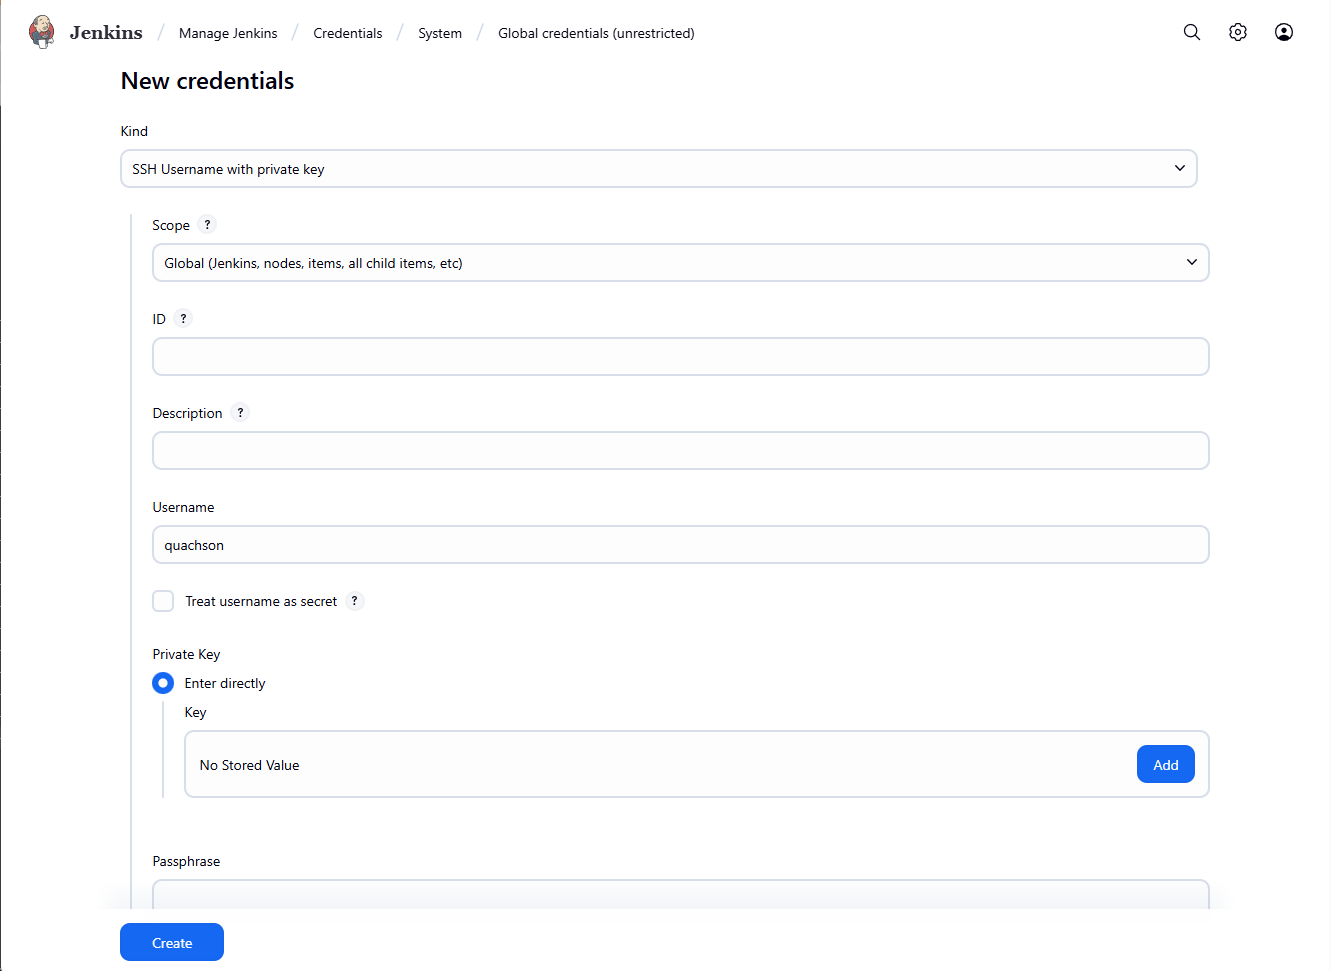
Add private key as SSH Username with private key vào Security --> Credentials

- Username: [your githhub username]
- Enter directly / Add
-----BEGIN OPENSSH PRIVATE KEY-----
b3BlbnN....
-----END OPENSSH PRIVATE KEY-----
Create the Jenkins job
- Dashboard > New Item
- Name the project sample-app, then choose the Multibranch Pipeline option and click OK.
- On the next page, in the Branch Sources section, select Git from Add Source dropdown.
- Paste the HTTPS clone URL of your sample-app repo under the Project Repository field. Replace GITHUB_USERNAME with your Github username:
git@github.com:GITHUB_USERNAME/project-name.git- From the Credentials menu options, select the github credentials name.
- Under the Scan Multibranch Pipeline Triggers section, check the Periodically if not otherwise run box and set the Interval value to 1 minute.
- Leave all other options at their defaults and click Save.